Follow me over here @morgancorbett on instagram to see my latest projects, home decor, things happening in the art room, and photo sessions from morgancorbett.com !
We repainted our yellow floors last week and I am excited to share the new look with you soon!
Remember when I revived this old tray? Well, I did it again, but a new tray! I primed the cork part of the tray, but decided to leave a little still showing and then I used an awesome stencil made by Heidi Swapp to create this cool beehive pattern! I then created my own flower design on top! I sealed the final design using Krylon Clear Coat, acrylic sealer and also a brush on varnish.
I love globes, maps, and really anything travel related. I am always looking for ways to incorporate these items into decor for our home. I bought this lamp a few months ago and thought the shade needed something more interesting! My grandmother gave me lots of maps a few years ago from her and my grandfather's travels and I have been collecting them whenever I can at thrift shops and garage sales! I picked maps with similar colors and patterns and chose to rip them up and collage onto the shade with mod podge rather than cut and fit one piece.
Because I used a white shade, wherever the maps overlapped created a darker patch once the lamp was turned on. SO to fix this issue I painted the inside with black paint. Problem solved! Instead of displaying this lamp in our home I actually used the finished product for a gift exchange game we do every year with my family. My sister ended up going home with this one!
Ran out of gift tags and are hesitating to just mark that gift with a sharpie? Last year, paint swatch art creations were all the rage and you can still find uses for them! With a hole punch, some pretty pens, and string you can have a unique gift tag in no time!
* Do give the writing time to dry. The surface of the paint swatch will take a little longer.
You can also check out the simple diy gift tags I made last year here !
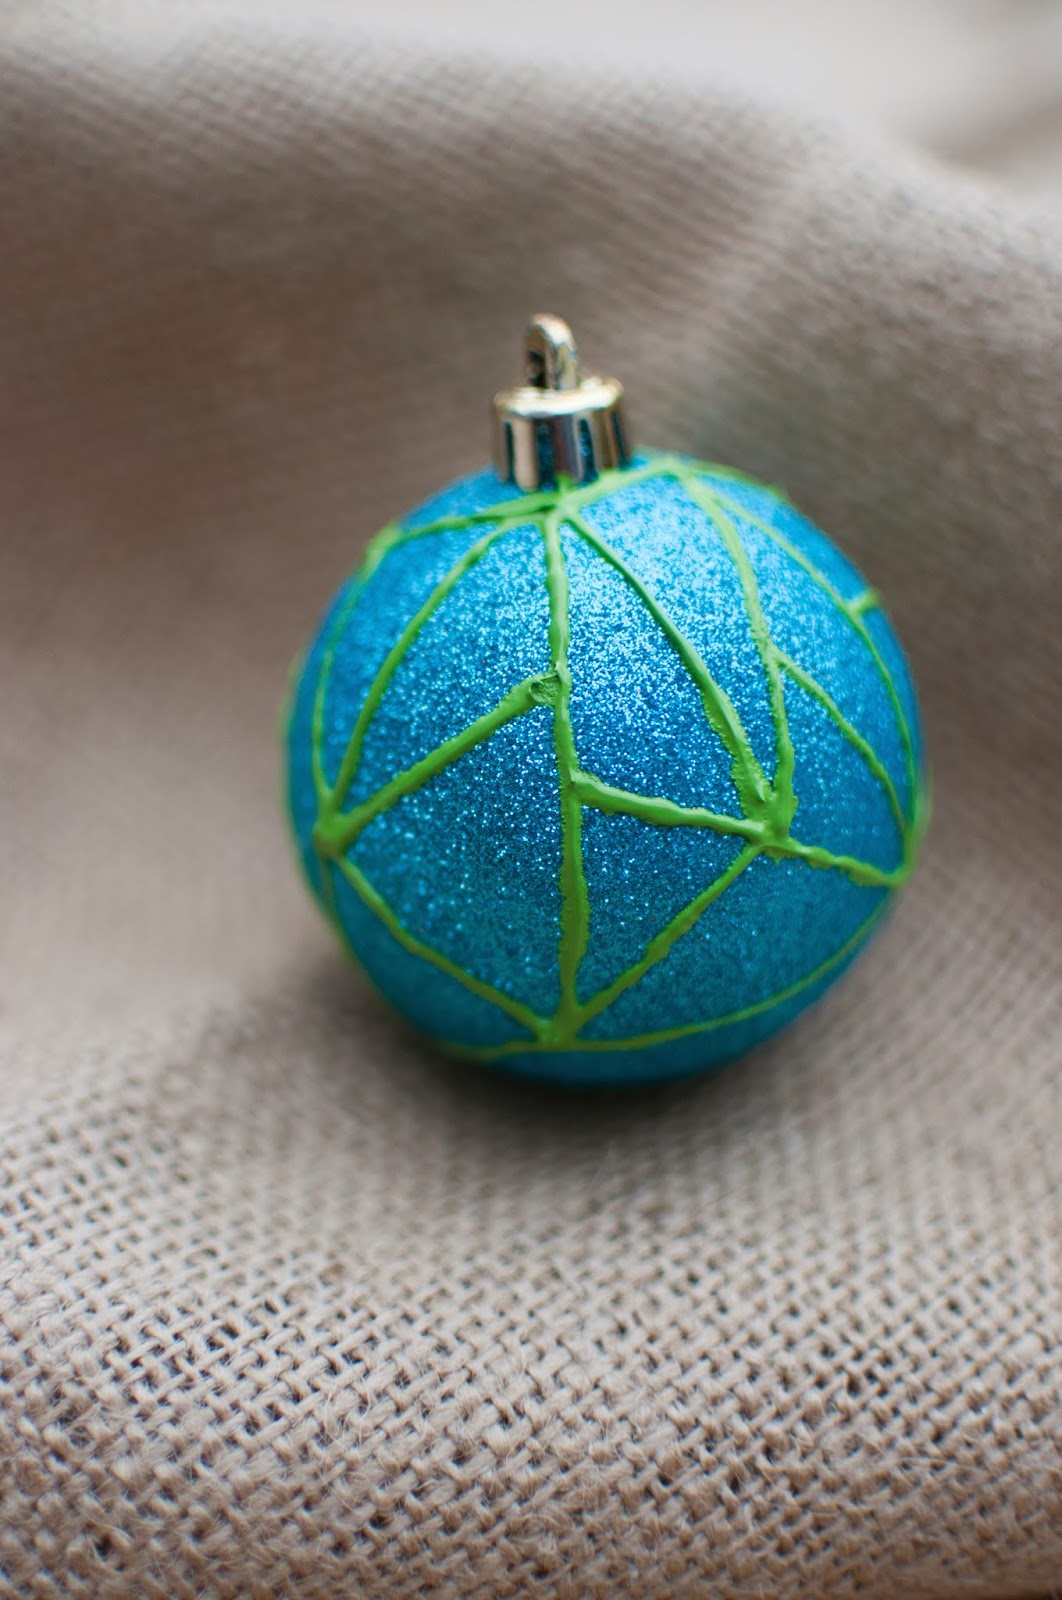
This year I opted for giving some of our old ornaments an update! I used Martha Stewart opaque glass paints to paint shapes and designs onto a variety of ornaments! I recommend having something like a small tape roll or plastic bottle cap to sit the painted ornaments on while drying to prevent rolling! Have fun and get creative with your designs!
I picked up these guys at the dollar store the other day and painted them with Krylon Fluorescent spray paint! I have yet to find this pair's permanent spot in our home, but my neon craving is now satisfied. I used 2 coats of spray paint, but you could also use 1 coat of primer before the color for better coverage.
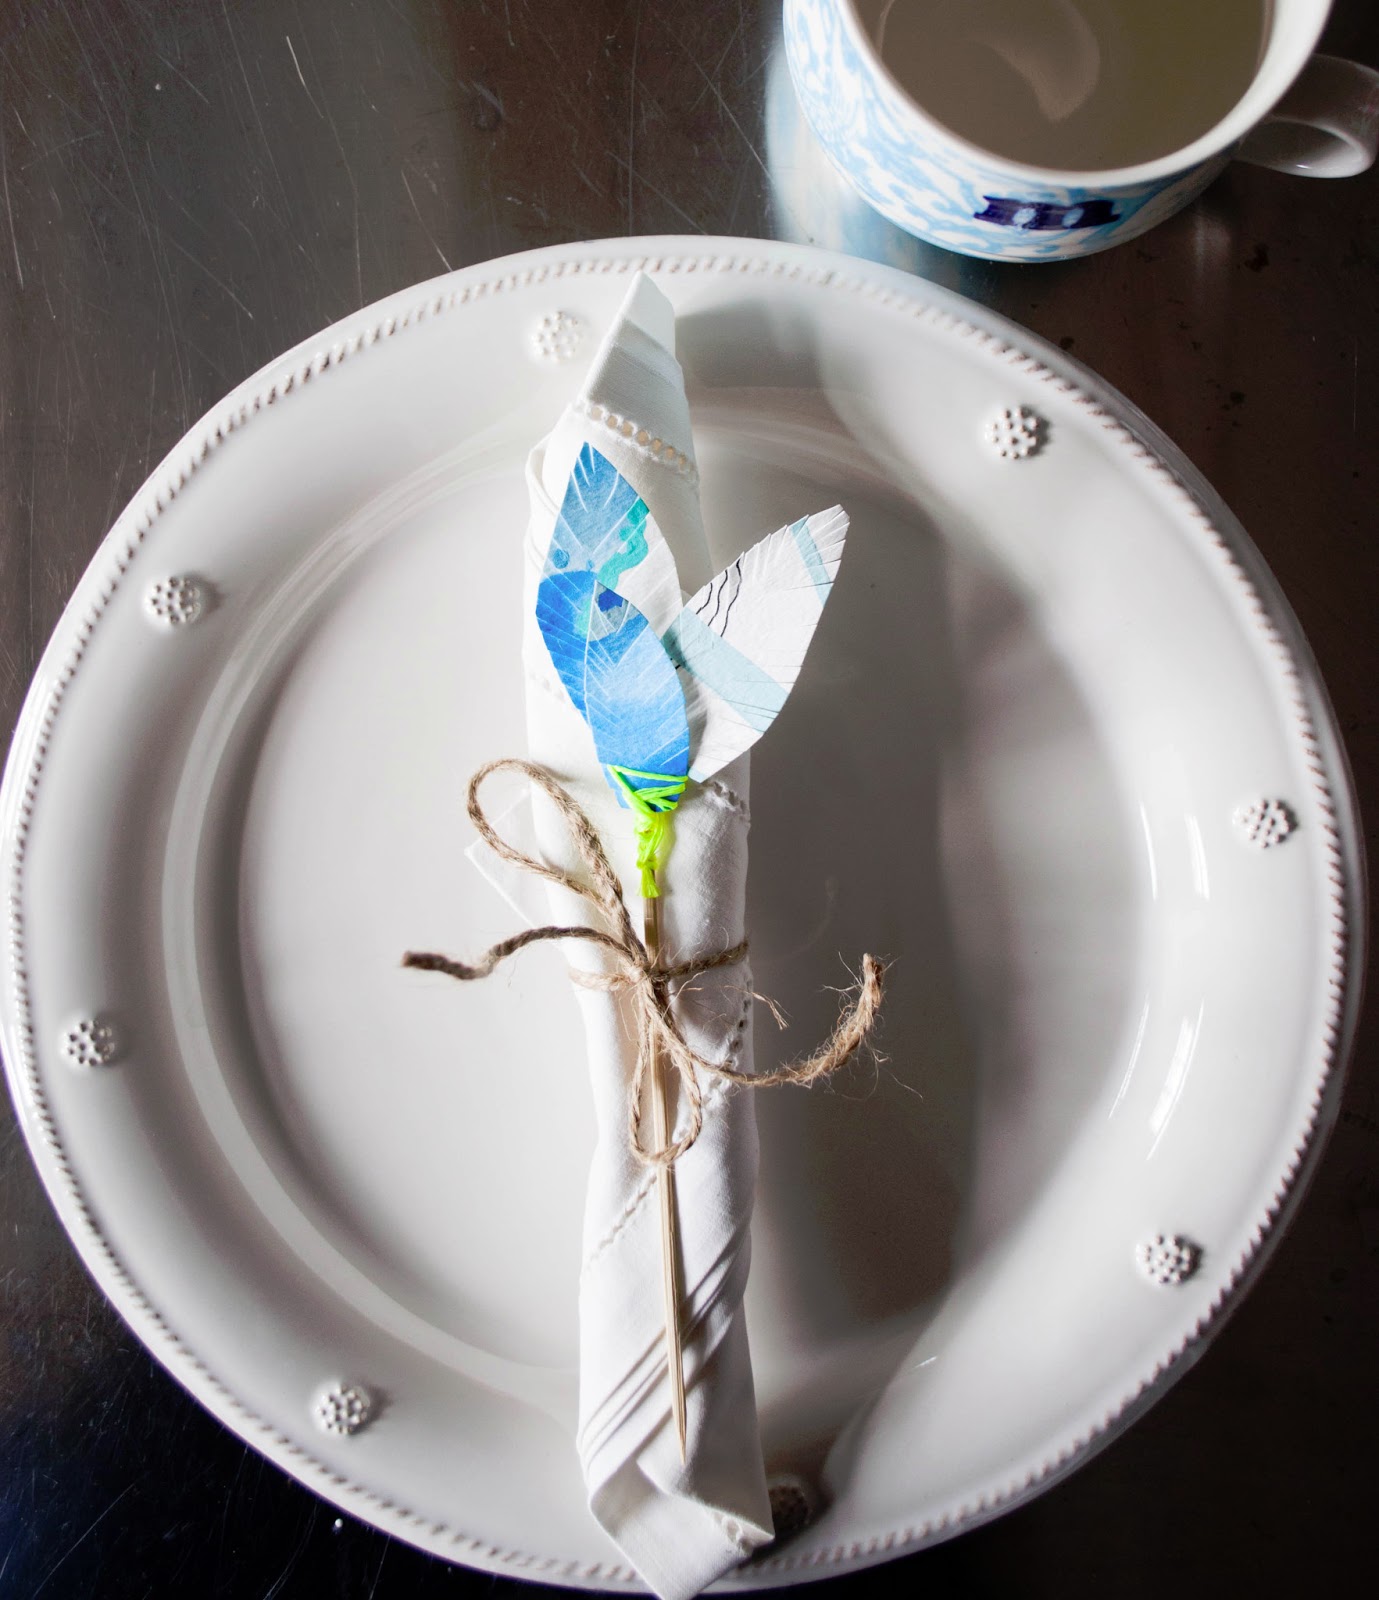
This weekend I had some fun experimenting with making paper feathers. I saw a few on pinterest here and here and tried some of my own! I think these would be fun for a party or add some excitement to a traditional table setting!
Materials:
*watercolor Paper
*watercolors
*waterproof Pen
*string, twine, or yarn
*scissors
*wooden dowels or sticks
For this project you will need:
*acrylic paint
*sharpie marker
*cork coasters around $2 at your local craft store
*masking tape to tape off stripes, etc.
*Krylon Crystal Clear acrylic coating (finishing spray)
This project is super easy and allows for so much variation! Grab your paint, cork, and markers and go for it!


 This project is super easy and allows for so much variation! Grab your paint, cork, and markers and go for it!


