

Wednesday, January 30, 2013
Monday, January 28, 2013
key lime cupcakes

For the cake:

*1 cup cake flour
*1 1/2 cup all purpose flour
*1 cup sugar
*1/2 tbsp baking powder
*1 stick of butter, softened &cubed
*1 tsp vanilla
*1 cup whole milk
*2 eggs
*zest of 1 lime
*juice of 1 lime
* 1/2 cup graham cracker crumbs
whisk together all dry ingredients.mix cubed butter into dry mixture until just coated. combine vanilla, milk, and eggs and add to dry mix in three parts.
bake at 325* for approx. 20 minutes. recipe makes 16 cupcakes.
key lime filling:
*1 can(14oz) sweetened condensed milk
*zest of 1-2 limes
*juice of 2 limes
*pipe into the center of baked and cooled cupcakes.
whipped cream frosting:
*1 pint (16oz) of heavy whipping cream
*4 tbsp powdered sugar
Using the whisk attachment on an electric mixer, whisk whipping cream
on high and slowly add in powdered sugar. Whisk until thickened. Pipe onto cupcakes and sprinkle or roll in graham cracker crumbs.


Thursday, January 24, 2013
painted cork coasters.

*acrylic paint
*sharpie marker
*cork coasters around $2 at your local craft store
*masking tape to tape off stripes, etc.
*Krylon Crystal Clear acrylic coating (finishing spray)
 This project is super easy and allows for so much variation! Grab your paint, cork, and markers and go for it!
Wednesday, January 23, 2013
visual journals.


Monday, January 21, 2013
h + moose.


Tuesday, January 15, 2013
diy project: drawer pull jewelry hanger


2. Find a suitable piece of wood and paint it! Solid or a fun pattern...
3. Drill holes in wood piece for the drawer pulls
4. Attach twine on the ends of the wood boards by wrapping continuously and tie to both wrapped ends twine strings for the board to hang by.
My sister and I made these together so we had two variations!


Tuesday, January 8, 2013


Friday, December 28, 2012
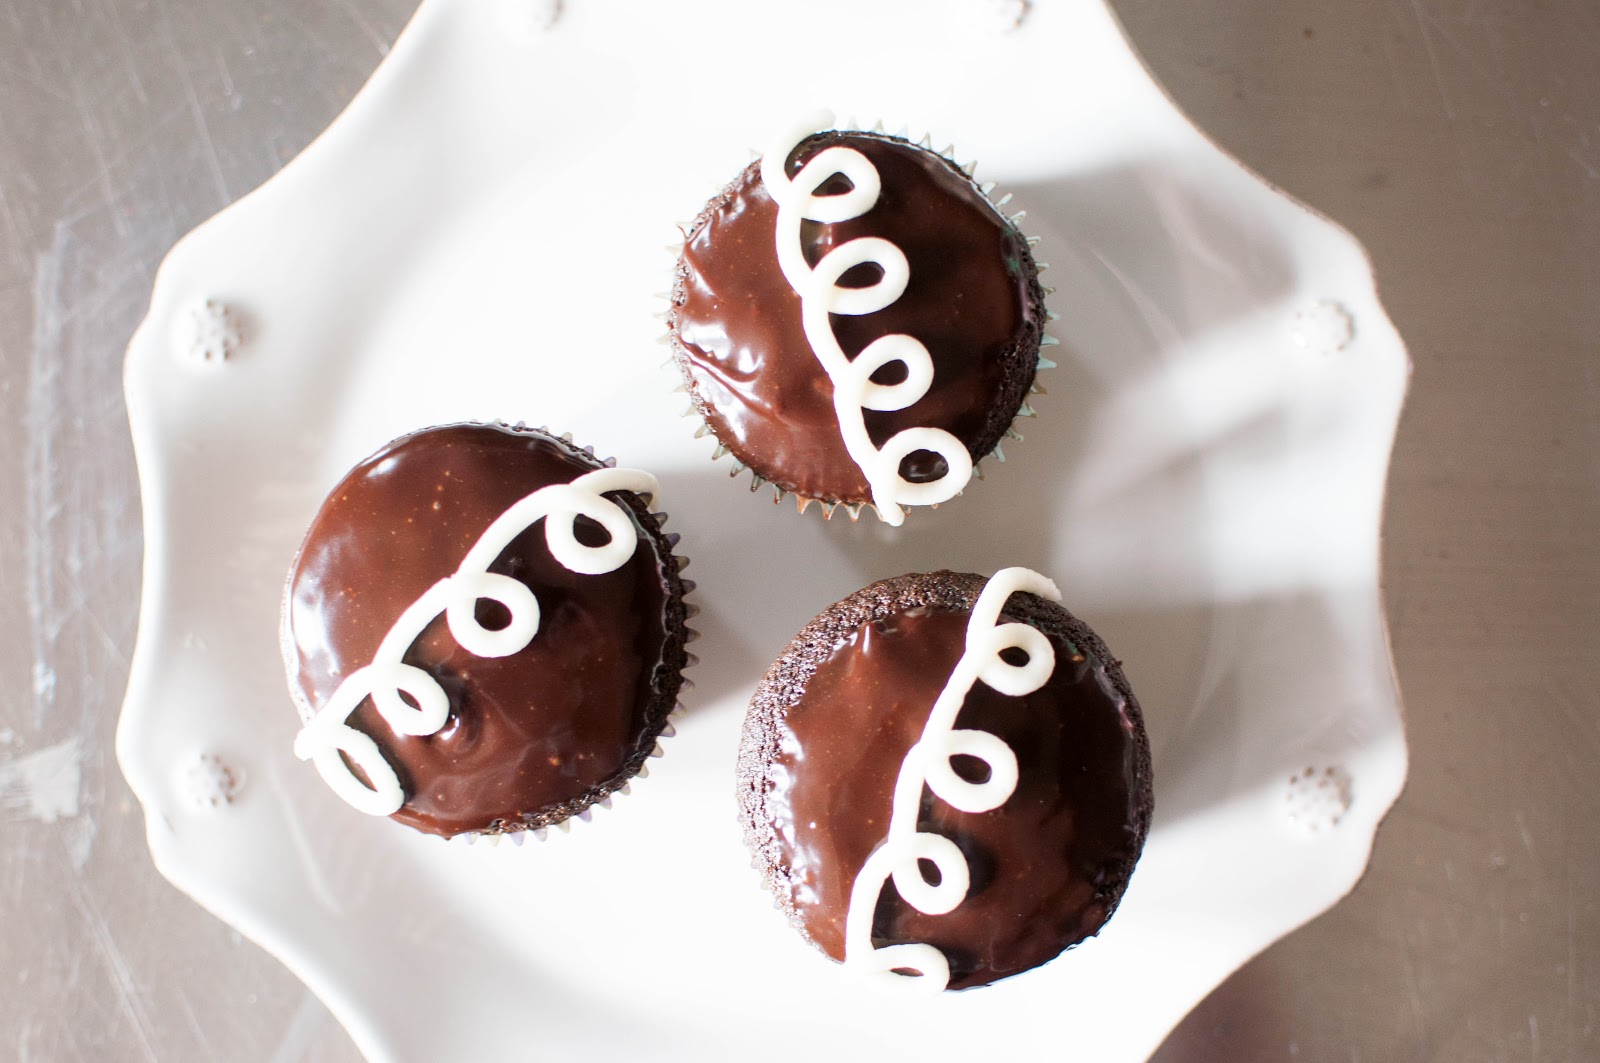
hostess cupcakes.

Ingredients:
*1&1/2 cups of flour
*3/4 cup unsweetened cocoa powder
*1&1/2 cups of sugar
*1&1/2 tsp baking soda
*1&1/2tsp baking powder
*3/4 tsp of salt
*3 eggs
*3 tbsp of vegetable oil
*1 tsp vanilla extract
*1/2 cup unsalted butter
* 3 tbsp sour cream
*3/4 cup warm water
Combine all dry ingredients together in mixer on low speed. Add eggs, butter, oil, vanilla, sour cream, and water. Beat until smooth. Bake @350 for about 20 minutes, or until toothpick comes out clean. Let cool completely and make frosting!
An extra creamy vanilla butter cream:
*Mix 1/2 cup of unsalted butter, 2 tsp of vanilla, and a pinch of salt together with an electric mixer. Slowly add in approximately 4 cups of powdered sugar 1 cup at a time, add 2 tbsp of flour, around 3 tbsp of cold milk. You might need to add in more milk or powdered sugar to have your desired consistency. The icing should still make peaks, but needs to be loose enough to easily flow through a piping bag.
Fill piping bag with frosting and for best results use a wilton #12 tip for filling the cakes. Gently insert the tip into each cake, squeezing firmly to release frosting, and slowly release as you remove the tip. Be careful not to insert too much frosting, or the cupcake will burst. You can also try this method to fill the cakes!
For the chocolate ganache:
Heat 1 cup of heavy whipping cream to a slight boil, pour immediately over 9 oz of semisweet chocolate chips and stir, ganache will need to thicken slighty and cool before dipping the tops of the cupcakes!
 After filling all of the cupakes, switch to a wilton #5 tip for piping the classic hostess look.

Wednesday, December 26, 2012
Merry Christmas!


 |
Hope you guys had a wonderful Christmas! Ours was lovely- we spent lots of quality time with family, playing games and enjoying good food!
Subscribe to:
Posts (Atom)