Pages

Wednesday, July 25, 2012

dye it yourself.

Before you throw out that old tank top, or old  t-shirt with stain on it, I recommend to give it one last chance to redeem itself. 
 
*warning* if you do try this, it's probably going to become addictive. You will see the transformation and want to dye everything in your path!


STEP 1: Follow the directions on your box of dye so that you get your desired outcome, I did the stove top option which requires heating the water, and adding in the dye, and you can always add some salt to your mix if you would like a darker, richer color.

STEP 2: wet the fabric completely and then place into dye bath. stir around frequently to have the fabric dyed consistently all over.

STEP 3: remove fabric from dye bath using gloves, and rinse well under water first under warm water, and then slowly move to cold.  

STEP 4:  Wash your fabric in the washing machine on cold with only other items dyed the same color!
*I washed those items alone the 2 next times and then washed them normally with like colors. 


 This was just a plain white tank that had lost its luster, it had a few stains and was just worn looking.
 This Georgia shirt was originally this light blue color, but in college I had dripped photo developer down the front of it, so it was looking pretty terrible.  I wasn't sure how this would dye, already being blue, but it worked great and the threads stayed blue- giving it has a neat look!

 And for the sad part of this experience.  As part of having this blog- I always want to document when some of these projects fail.  Because they do.  The mistake I made with these pretty vintage pillowcases is probably not a common one, but it happened, so I'll share!
 
 Make sure you know what color dye you have (sounds simple right?) I had an old box of lots of different dyes, and the package inside the box did NOT say the color on it. It was with all of the other purple dyes, had purple writing and so I assumed it was purple.  These vintage pillow cases were the first to take the plunge and low and behold... I had green pillowcases....
Not really what I was going for.. but are still kind of neat.

Thursday, July 19, 2012

diy pillow.


See this couch? I have been on a search for a while now for the perfect navy pillows for it. And after countless searches and being completely disappointed with the navy pillow selection out there (they shouldn't be that difficult to find, right?)... I decided to take matters into my own hands... and my sister's(she helped me make these)! 
 I bought the fabric at a local fabric warehouse for $4.00. It was a remnant that was discounted and pre-cut to 1 1/2 yards. I also bought (2) 20x20 pillow forms for $5 each.  The pillow instructions below are for a slipcover pillow, so that the fabric can be removed and washed easily!
 STEP 1:  First, we used a standard pillow case(which the pillow form fit snug in), to measure the width to account for the depth of the pillow.  A standard pillow case is 21" We added another 1" to account for a seam allowance on each side of the pillowcase. 
STEP 2: We measured and marked from the edge of our fabric 22" across all the way down our fabric, and cut.
STEP 3: We then needed to figure out the length.  We needed a length 2 1/2 times longer than out width.  So we said 21"x 2.5 equals 52.5 (the length of our fabric). We measured, marked 52" long and trimmed the excess.
 STEP 4: We folded our fabric 1/3 of the way in.
STEP 5: And then we folded 1/3 of that folded piece down. This creates the opening that will remain open so that you can easily remove the pillow insert for washing. *I would suggest adding a snap or button on thi flap when the pillow is finished to close this opening.*
STEP 6: The other end of fabric can then be folded down, and should overlap slightly.
STEP 7: PIN  the 2 side openings just inside the inseam (where you want to sew).  Remember that 21" across is what your pillow is going to be, so you should have 22" to allow for  1/2" seam on each side.

See that pink mark? That's where you will sew.
STEP 8: Sew your sides and remove pins. Turn your pillow right side out again and stuff in your pillow form! 

 I'm excited about the end product.  Exactly what I wanted for about $ 15.00!


Wednesday, July 18, 2012

blueberry cupcakes.


*1 3/4 cup cake flour
*1 1/4 cup all purpose flour
*2 cups sugar
*1 tbsp baking powder
*1 tbsp sour cream
*3/4 tsp salt
*2 sticks of butter cut into cubes
*1 cup whole milk
*1tsp vanilla
*4 large eggs
* 1/2 cup blueberries, finely chopped
* 2 tbsp blue jello mix( the powder, not actual jello:)

1.Preheat 325, mix flours, sugar, baking powder, and salt until combined. Then add butter until just coated.
2.Whisk eggs, sour cream, milk, and vanilla. Add wet ingredients in 3 parts, let each mix until incorporated. 
3. Add blueberries and jello mix. Mix until combined.
4.bake @325 for about 20 minutes or until toothpick comes out clean.
This recipe makes about 32 cupcakes.
Blueberry Cream Cheese Frosting:
*1 pkg of cream cheese
*1 stick of butter
*3-4 cups powdered sugar
*2 tbsp of flour 
*1tbsp blue jello
*1/4 cup blueberries, finely chopped, and smashed.(if the chunks of bluberries are too big- it won't fit through the piping bag.)
* 1 tsp vanilla
*pinch of salt

1. soften cream cheese and butter, beat together in mixer, add in blueberries, vanilla, and salt.
2. slowly start adding in powdered sugar 1 cup at a time,then the 2 tbsp of flour, beating after each addition.
I made these cupcakes for an afternoon of printmaking with some friends and family- the nest below is one that my sister made.

A few of the girls that came!

Wednesday, July 11, 2012

r+a

Wanna see my latest photo session with these two? You can check it out over HERE

Monday, July 9, 2012

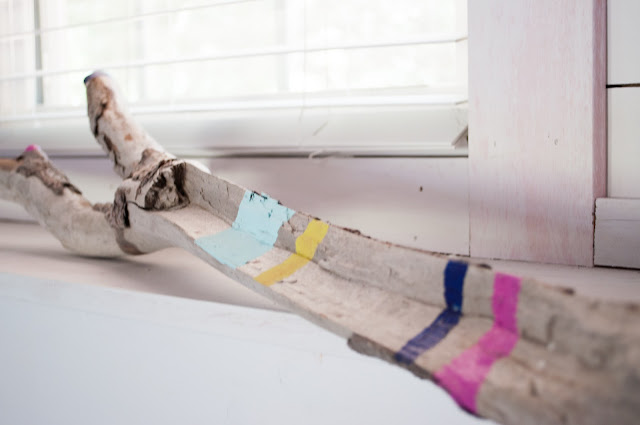
painted beach finds.

 At the end of every beach trip I find myself hauling home some washed up coral, shells, or maybe some driftwood.  Not sure why I do it.. my mom has a neat little sand collection from her travels.. so maybe its in my blood to collect these things.   Sometimes these items are naturally colorful, like the coral piece below, but other times I can't resist my urge to paint at least parts of these things, so here's what I did. 


 Not sure how I will display these shells yet... I might like a shadow box frame these.

Have some shells or sticks perfect for painting? Just use acrylic paint and some spray varnish as a finish if you want them to have a slight luster...